
When winter’s icy grip takes hold, the risk of ice dams forming on your roof becomes all too real. These stubborn accumulations of ice can wreak havoc on your home, causing water damage, roof deterioration, and structural issues. In this guide, we’ll explore the signs of ice dam damage, how to assess the extent of the problem, and the crucial steps to repair and prevent further issues. Whether you’re dealing with a recent ice dam disaster or preparing for the cold season ahead, this guide has you covered.
Understanding Ice Dams
Ice dams are a common winter woe; when snow on your roof melts and refreezes, it creates a barrier. This buildup prevents proper drainage, causing water to back up behind it. As winter progresses, the situation worsens as the ice dam traps more melting snow. Eventually, water can seep under your shingles and into your home, easily leading to water damage. Understanding ice dams is crucial for homeowners, especially those in cold climates. After all, identifying early signs and taking preventive measures can save you from costly repairs and protect your home’s structural integrity. So, stay vigilant and act promptly when you notice any signs of trouble.
Signs of Ice Dam Damage
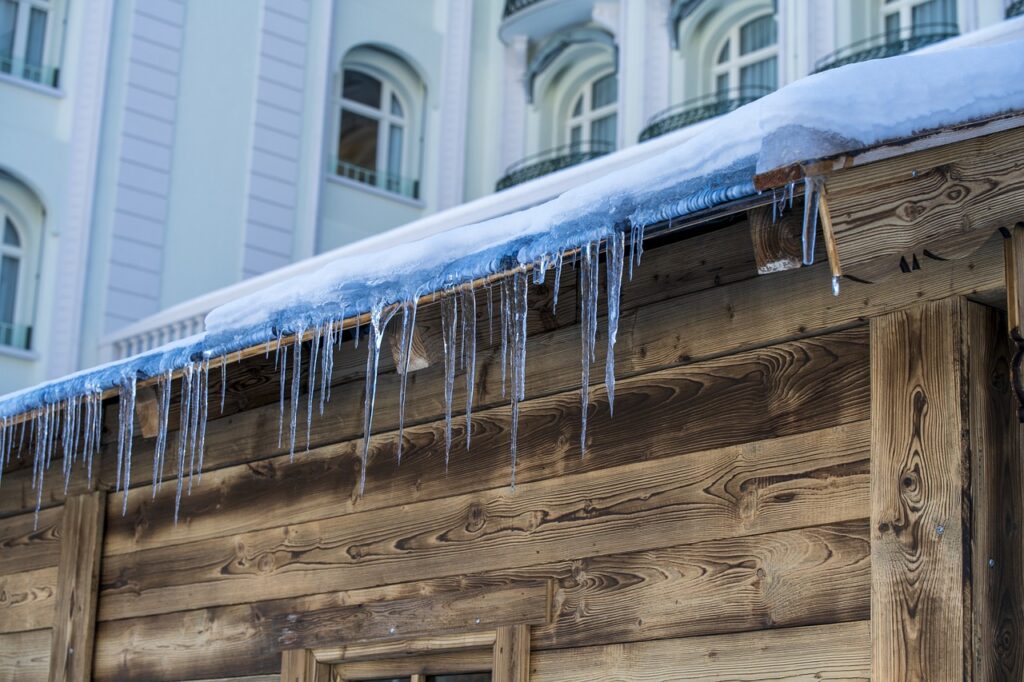
Signs of ice dam damage can vary from subtle to overt, but all should be taken seriously. Exterior indicators often include icicles hanging from your roof’s edge, which may seem harmless but can signal trapped ice. Damaged or missing shingles are another red flag, indicating that ice has compromised your roof’s integrity. A buildup along the eaves can cause water to infiltrate under shingles, leading to leaks inside your home. Interior signs are equally crucial to watch for, such as water stains on your ceilings or walls, which may appear as discolored patches or peeling paint. A sagging or bowing ceiling is also a severe sign, suggesting water has accumulated in your attic. Finally, damp or moist insulation in your attic is a clear sign of water intrusion.
Roof Assessment Tools and Equipment
Roof assessment tools make the inspection process more accurate and safe. Some key items to have on hand include a sturdy ladder, ideally one with adjustable legs for stability. A good flashlight or headlamp is also crucial. Next, you’ll need a moisture meter to assess hidden damage, especially after winter or heavy rainfall. Don’t forget basic safety gear like gloves, a hard hat, and proper footwear with slip-resistant soles. Finally, investing in ice cleats and a safety harness is also smart. The importance of these tools makes it necessary always to have them in your home. These tools can literally save your life. Therefore, when settling into a new home and moving in winter weather, it should be one of your main priorities to secure them ahead of time and meticulously pack them among your essentials so they’re always ready for use.
Doing a Step-by-Step Roof Inspection
Conducting a step-by-step roof inspection is necessary to ensure the longevity and safety of your home. Begin with a visual examination from the ground, looking for any noticeable issues like missing or damaged shingles. Then, carefully climb onto the roof, ensuring you have the necessary safety equipment. Examine the roof’s surface, gutters, and eaves for signs of damage or debris buildup. Access the attic safely and check for any water stains on the ceiling or walls, which can indicate leaks. Look for any signs of sagging or bowing in the ceiling, suggesting structural damage. Finally, use a moisture meter to assess hidden problems, particularly if you live in a region prone to heavy rainfall or snow. Document your findings with photographs and notes, which can be helpful for insurance claims or future reference.
Documenting Damage
Documenting damage is a step you should not skip in the process of addressing roof issues effectively. It involves capturing clear photographs of the damage, taking notes, and keeping detailed records. These records are essential evidence, especially when dealing with insurance claims or professional contractors. When documenting, ensure that the photos are well-lit and focused and showcase the extent of the damage. Describe the damage in your notes, including its location, size, and any visible causes. Keep a timeline of when the damage was discovered and any subsequent changes or repairs. These records assist in the assessment and provide a reference for future maintenance.
DIY vs. Professional Assessment
Determine whether to opt for a DIY assessment or seek professional help for roof issues. If you have experience in roofing and feel confident in your skills, a DIY assessment can save you money. However, it’s essential to recognize your limitations. If the damage is extensive or you are unsure about the extent of the problem, it’s wise to consult a professional roofing contractor. Professionals have the expertise, equipment, and knowledge to conduct a thorough assessment accurately. They can identify hidden issues and recommend appropriate solutions, which DIY assessments may overlook. Moreover, professionals are well-versed in safety measures and regulations, making their inspections safer.
Preventing Future Damage
Preventing future ice dam damage is something you should always work towards. Proper insulation and ventilation are paramount, as they regulate your attic’s temperature and minimize the risk of dams forming. Adequate attic sealing also helps prevent warm air leakage, a key factor in dam formation. Moreover, installing roof heating systems like heat cables or roof panels can melt snow and ice, preventing dams from taking shape. Furthermore, air ducts can actually contribute to ice dam prevention, too.
Ensuring that your home’s heating and cooling systems are well-balanced can help maintain a consistent temperature in your attic, reducing the likelihood of hot spots that lead to dams. Finally, seasonal maintenance, such as clearing snow from your roof after heavy storms, is crucial, especially in regions prone to moving in winter weather conditions.
Repairing Damage
Repairing ice dam damage is an important step to safeguard your home’s structural integrity and prevent further issues. When it comes to addressing the consequences of ice dams, it’s essential to consider the extent of the damage. Minor problems, such as missing shingles or minor leaks, can sometimes be tackled as a DIY project. Still, it’s advisable to seek professional assistance for more extensive damage, especially when interior areas are affected.
Hiring a reputable roofing contractor with experience in these repairs ensures the job is done correctly and comprehensively. They have the skills and equipment to address structural issues, replace damaged roofing materials, and professionally restore your home. While DIY repairs can save you money initially, professional intervention is often the best choice to guarantee the long-term well-being of your home.
Ensure your home’s longevity
Understanding how to tackle ice dam damage is essential for every homeowner, especially in regions prone to freezing winters. You can protect your home by promptly identifying signs, assessing the damage, and taking the necessary preventive measures. Whether addressing repairs, investing in proper insulation, or scheduling regular roof maintenance, staying proactive will ensure your home’s longevity and safety, even in the harshest winter conditions!